Tuesday, 30 September 2014

A bit of everything

I have been doing a little bit of everything this week. I started a new crochet project a charcoal grey and mustard shawl, I will post photographs once finished. The only problem is everytime I start to crochet my dog Tilly thinks the ball of yarn is a pillow, she is not too happy when it keeps moving.


In between doing this I have been making a few things for Ulverston Scrap Store, I volunteer at the Scrap Store once a week, Thursday's between 2pm and 5pm. I try to make things using items from the store to give people a few ideas on what you can make. I have made two items this week, the first one was pin wheels using sample wallpaper pieces.


The second project was a fridge magnet made using tin lids from the store.


I have also been making lots and lots of jam, redcurrant, blackberry, blackberry and elderberry, damson, plum, crab apple. It's been a great year for fruit and vegetables in the UK, much better than last year. I have just harvested all of my sturon white onions and boltardy beetroot, yellow and green beans, pointed cabbages. It's the first year I have ever grown turnips and I have been pleased with the results. The only items I have in the allotment left are cabbages, turnips and green and purple sprouts. It's a good job they are not ready to harvest yet as I'm rapidly running out of storage space.


Thursday, 4 September 2014

What to make with Plarn?

I decided to crochet my Plarn and crocheted a bag (my husband did look slightly confused as to why I was crocheting a bag out of carrier bags, but sensibly kept quiet!). I used quite a large crochet hook for this a size 7mm (US K). I also used green and white Asda carrier bags for my Plarn.


The bag is quite thick and holds quite a lot of shopping as well, I'm pleased with the result.


What is Plarn and how to make it?

I was having a look at the various crafts on Pinterest and came across something called Plarn. Plarn is made out of carrier bags cut a certain way and joined together to make plastic yarn. It is easy to make and quite addictive. All you need is a hard work surface, carrier bags, measuring tape, pen and scissors. Once the plarn is make you could either knit or crochet it.

First of all flatten the carrier bag on to a hard service.


Fold the bag in half


Fold the bag in half again


Cut the handles off at the top of the bag and cut the bottom of the bag off.


I then measured and marked the bag at one inch intervals and cut them into strips.


Now to join them together, open two strips up and lay one on top of the other.


Take the bottom loop and bring it through the top loop and then bring it through itself.


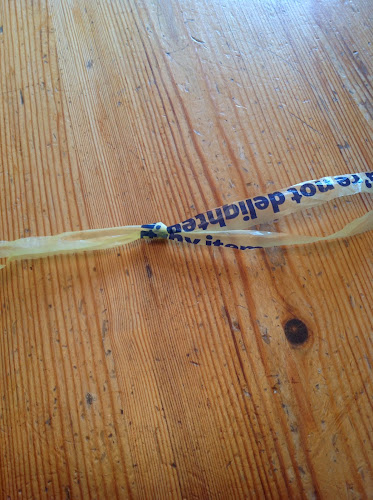
Gently pull them together and they will form a knot, carry on doing this until you have the length of plarn you want.


Wednesday, 20 August 2014

My new coffee pot

A photo of my new enamel coffee pot, I bought it today from Chesters by the River at Skelwith Bridge. They also had the coffee pot in midnight blue and cups to match. The company that makes the enamel items is called Wild & Wolf Ltd


Coming soon....... how to make plarn (plastic carrier bags made into yarn) and then crocheted.


A small break

I decided myself and my husband needed a break from painting the outside of the house this week and so we decided to go for coffee and cake in the Lake District, it's only about fifteen minutes drive or so I thought....... I now know the reason why we avoid the Lake District in the Summer months, the traffic was quite bad, long queues and it's very difficult to get a parking space. However, once there is was definitely worth it. We had picked a lovely day, the weather was warm, slightly overcast, exactly how I like it to be.

We went to a cafe I had not been to before in Ambleside, right overlooking the water. It's called The Waterhead Coffee Shop on Borrans Road in Ambleside. There are a few free parking spaces and if they are full then there is a car park nearby which costs £1.80 an hour. I had a lovely homemade blueberry scone with cream and a latte. My husband had a slice of homemade apple pie and a cup of tea, the apple pie must have been good as it was gone in under a minute, I didn't even have time to take a photo of it!


I took a couple of photos while we were there.


As we were enjoying our cakes and drinks the Ambleside cruise boat arrived, the queue to go on it was very long.


We also had the Mountain Rescue Helicopter fly over a couple of times


On the way home we went past Skelwith Bridge, there is a little restaurant/shop there called Chesters by the River, it's definitely worth popping in they have some really lovely gifts there. I couldn't resist popping in myself and bought a lovely enamel coffee pot. I will post a photograph of it later, it's gorgeous, it's white and has foxes and owls on it.

I also stopped and took a few more photographs, these two were taken just outside Skelwith Bridge, driving towards Coniston.


Saturday, 16 August 2014

Rain, rain go away...

This weekend I decided I would paint my garden benches a lovely bay tree green, I opened my curtains this morning and instead of the sunny day I imagined, it was raining, dull and windy, so bang goes that idea.

I decided instead to finish off some embroidery. I love embroidery, I have been doing it for over 25 years. I am very lucky as I have a lot of my grandmother's embroidery transfers, needles, rings, thread, material, probably enough to carry on doing for the next 25 years.

I bought some Dorma pillowcases a couple of months ago and transferred some vintage violets on them.


The Dorma pillowcases are in a shade called Heather and I decided to embroider the flowers in different shades of purple-pink colours. I apologise as I know the thread is from DMC but it is vintage thread and they did not have the DMC colour numbers on them. The stems and leaves are a mixture of two different green colours, two threads of a medium green colour and one thread of a light green colour.

I have only used four different embroidery stitches for the pillowcases.


The pillowcases do look a little bit crinkled but that is because I have had a hoop around the embroidery transfer, once they have been washed and ironed they will be completely flat and won't look crinkled/puckered.


Sunday, 10 August 2014

Gin, Gin, Gin.... Maybe Vodka

I have picked the last of my blackcurrants, redcurrants and gooseberries from the allotment. I have had so much fruit this year it was hard to decide what to do with it all, you can only make so many pies and jam. So I decided to make gin with it. In particular redcurrant and vanilla gin, red gooseberry gin, blackcurrant liqueur and for a change redcurrant and orange vodka.


Redcurrant Gin

300g of Redcurrants
150g of Caster Sugar
1 Teaspoon of Vanilla Essence or 1 Fresh Vanilla Pod
Bottle of Gin or Vodka
Large Kilner Jar

Put all the redcurrants in the kilner jar, crush them with a wooden spoon, add the sugar, vanilla essence or pod and mix together then add the gin or vodka. Screw the lid back on give the jar a really good shake and then put it somewhere dark. Shake the jar every day for one month, after that just shake every couple of weeks. It will be ready in six months or like me you can leave it for a year. When you are ready to bottle it, sieve the mixture and then pour through muslin into a bottle.


The red gooseberry recipe that I used is from another blog called cottage smallholder, it is very simple, the only ingredients or items you will need are gooseberries, granulated sugar, gin and a kilner jar.


Blackcurrant Liqueur

Blackcurrants
Caster Sugar
Gin
Kilner jar

Each blackcurrant needs to have its skin pierced to release the juice. Fill the kilner jar to about a third full with the pierced currants. Fill the jar with the sugar until it has covered the currants. Finally pour the gin in, secure the lid and give it a really good shake. Put the jar somewhere dark for six months, shaking daily for a month then every few weeks after that. As before when ready, sieve the mixture, then pour through muslin and bottle.


Enjoy, I know I will!